From macOS to Debian: A Two-Week Experiment 

After many years as a Mac user, the last couple of years I’ve become increasingly frustrated with the macOS software direction and the continuous erosion of the historically vibrant indie developer ecosystem.

macOS Tahoe

I use my Mac for many hours a day: to plan, read, work, code… Using a device that helps me get things done and stays out of the way is critical to me. Apple’s macOS is still that device to me, but there’s been enough warning signs that make me take a step back to see what’s out there.

So, what better time than the holidays to do an experiment?

  1. Can I find a Linux Distribution and Desktop Environment that I, a seasoned Mac user, enjoy using?
  2. Can I successfully migrate all the data I will need for two weeks?
  3. How do I feel after these weeks? What did I like, what did I dislike? Should I move to Linux full time? (unlikely, but possible).

At the end of the day, I’m looking to have a clear understanding on what would it take if I do decide to make the jump permanently, what tradeoffs would I have to make. As Steve Jobs said, it’s good to have options for the “just in case” scenario.

Apple secretly compiled every OSX release for both PowerPC & Intel, for the “just in case” scenario. It paid off.

1. Great, but what Linux Distribution should I choose?

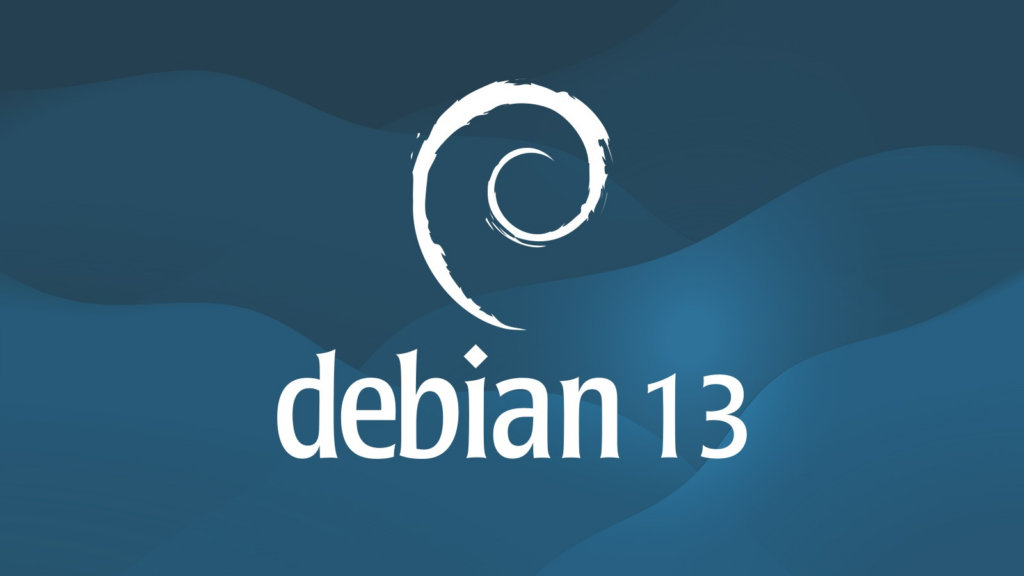
Let me preface this by saying I’m not looking to spend time tinkering with my device. I want something that I can set & forget, that’s stable, secure and dependable. Something that enables me to focus on my work. With that in mind, the answer was a no-brainer: Debian.

Why? It’s run by tens of millions, including the International Space Station, CERN and Google. And it’s the foundation for many other distributions: Ubuntu, Mint, Pop!, Kali… You can’t go wrong with Debian: dependable, trusted, popular, and secure.

Here’s how the latest Debian 13 release was reviewed: “Debian 13 doesn’t try to wow you with flashy gimmicks or unnecessary bloat. […] For anyone looking for stability, security, and reliability, […] Debian continues to stand as one of the most trusted Linux distributions.” Source

Excellent! Now that we’ve chosen Debian, all that remains is confirming your “Desktop Environment”, that’s the graphical interface of your operating system.

Debian installs GNOME by default, and for good reason: it’s modern, minimalist and distraction-free. Oh, and you might notice it unapologetically borrows from macOS.

Debian 13 using GNOME

2. Installing the OS & First Impressions

Now that we know what we want to install, let’s get to it. And the good news is, it’s remarkably simple: from downloading the image to landing in the desktop it took less than 30m. And most importantly, everything worked out of the box. You’ll find step-by-step instructions at the end of the post.

Once you’re in the desktop, coming from macOS, a couple things will surprise you:

  • The desktop is permanently clean, no files or clutter, just a nice background. You can’t add stuff there.
  • Spaces are a key part of the experience, switch between them with (Windows+Alt Right/Left).
  • The Windows key triggers Universal Search (aka ‘Spotlight)’, you can quickly open apps, files or move apps between spaces. This is also the ONLY place where you’ll see the app launcher (aka ‘Dock’).
  • The OS is optimized for both mouse AND keyboard use – in fact you can become extremely productive with only the keyboard. Using the mouse is an option but not a requirement.
  • There’s no maximize/minimize buttons, instead you use edge display snapping or key shortcuts (Windows + Up/Down/Left/Right).

Probably the thing that struck me the most at first is how the OS goes out of its way to incentivize you to focus and stay in flow. At first it threw me off, but it has become one of the things I enjoy the most. How does it do that, you ask?

  • Incentivizing you to have in each space ONLY what you’re working on at that moment, which massively reduces distractions.
  • Making it trivial to move between spaces without distractions, giving you more screen real estate when you need it or allowing you to park things for later.
  • No OS bloat or unnecessary gimmicks – every feature is about enabling YOU while staying out of the way.

To be fair, due to my years of experience, my inclination was to use it like macOS. And, to be clear, you ‘can’ do it: ‘Tweaks’ adds back maximize and minimize and ‘Extension Manager’ can make the dock permanent or even allow files on the desktop. But then you’re missing out on what makes Debian/GNOME awesome.

Instead, I left my old habits behind and embraced its focused philosophy. Boy I’m glad I did: it naturally helped me stay in focus, I was truly surprised at how much I enjoyed using it and how much stuff I got done.

Oh, did I mention it’s extremely fast and efficient? Yep! The same device that was lasting about 5h on battery now lasts 10h and I’ve not even heard the fan – and it looks beautiful too.

3. Moving Data & Installing Apps

Broadly speaking – there’s two main buckets here: the data I needed and the apps I used. And this is where we start to hit some bumps in the road.

Data:

  • Documents: the easiest by far, as simple as moving with a USB. Everything worked just fine, no issues. Syncing is also trivial using file share services or rsync.
  • Music: unfortunately, there’s no simple solution to import your iTunes library. Instead, I copied all the songs into the Music folder, which works great but loses all metadata (playlists, play counts, ratings…). If you know of a reliable way to import it please let me know.
  • Photos: moving the data from Photos was not an issue, as simple as exporting the images. Keeping it in sync with iCloud, that’s a different story. As long as you keep the source of truth in your device you’re fine though, just go online and download them every so often: not great, not terrible. Like music, this is an area I’m likely to revisit – there must be a better way.

All in all it was easier than I had expected, even if the Music and Photos import was not as smooth as I’d like.

Apps:

One of the main reasons I use the Mac is because of its vibrant indie ecosystem, so unsurprisingly this was the most painful part of the move. Here’s some examples:

  • RSS Reader (NetNewsWire): The closest I found was Liferea, it gets the job done. I also tried Newsflash, but it could not compete in terms of speed.
  • Mail (Apple Mail): No direct replacement, you either have to go super simple with Geary or complex with Evolution. I ended up with Evolution.
  • Research (DevonThink): Obsidian is able to do most of what DevonThink offers and, given its extensibility, you can tweak it to your needs.
  • ToDo (Things 3): Planify appears to be close to it, although I did not test its syncing.
  • Mastodon (Ivory): Tuba has great bones, but is not as feature complete yet – basics like keeping timeline position are not present.
  • Blog (MarsEdit): I could not find anything that could replace it, instead I used the WordPress web interface which was decent and got the job done.
  • Scripting/Text Manipulation (BBEdit): Geany is quite close in its simple appearance and powerful functionality.
  • IDE (Nova): It does not have the joyful experience that Nova offers, but VSCodium gets the job done.
  • Terminal (Apple Terminal): Although Debian comes with Terminal, I prefer using the newer (and nicer) Console.
  • Image Editing (Pixelmator/Acorn): Could very easily use GIMP for all my basic image editing needs.
  • Browser (Safari): Firefox ESR worked great and integrated perfectly with the OS, I’ve also been using GNOME Web quite a bit. As backup, in case a website misbehaved, I installed Chromium.
  • Web Apps (Safari): Web does an excellent job to create web apps, arguably better than Safari. It uses the WebKit engine behind the scenes, the same as Safari.
  • Office (MS Office): LibreOffice worked great for everything I needed, primarily Excel and Word.
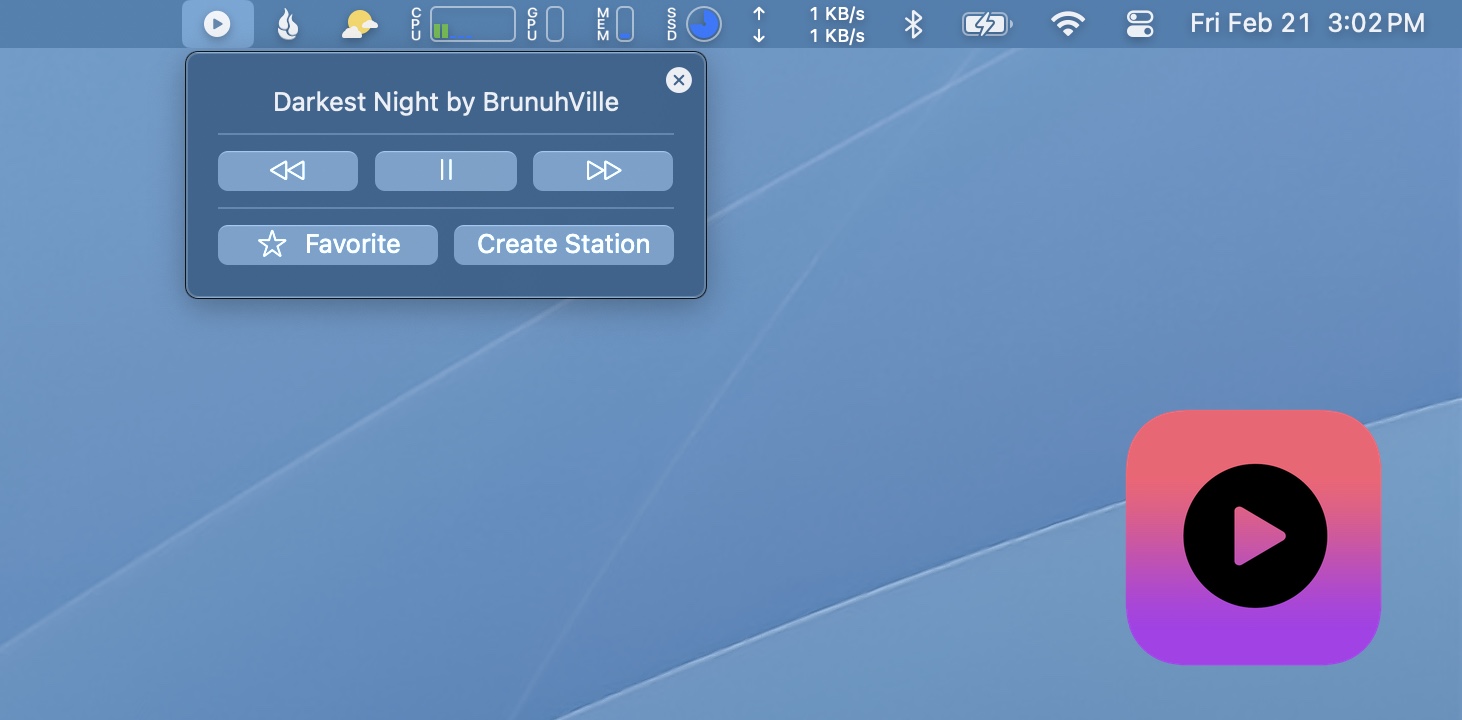
  • Music (Apple Music): Really enjoyed Gapless for my music needs, super fast and a delight to use. If I could import iTunes Music library metadata, this could trump any other music app I’ve ever used – it’s that good.

Is the Linux app ecosystem enough? For the most part, yes. But some concessions would need to be made. I would like to see more indie developers able to make a living from Linux software, which in turn would deliver even more great apps.

4. What’s next

Well, I must confess I enjoyed this experiment much more than I anticipated. The setup was simpler than I thought, using Debian 13 has been a delight, and it’s been a productivity boost.

All things come to an end though, and the two weeks are over. Am I ready to leave macOS behind? Two weeks ago I would have bet no. Today, I absolutely could, my ‘just in case’ plan is ready.

What’s more, I’m going to be keeping this productivity booster for daily use. I’ve added a couple more tweaks to make sync with the Mac seamless so I can have the cake and eat it too!

It’s been an amazing ride and a very fun experiment, I may make this into a yearly tradition – we shall see.

Questions / Feedback I’m @MarcMasVi

Marc

Appendix – Installing Debian 13 + GNOME

Step 1: Get a computer, almost any device will do (except for ARM macs)

I went with an HP Elite Dragonfly Max (11th Gen i7 w. 16GB memory)

Step 2: Download the image an burn it into a USB. For us mere mortals, keep it simple and grab the 64-bit PC DVD-1.iso, it includes everything you need in one neat package. Here’s the link to the downloads page.

Screenshot of the Complete Installation from Debian’s download page

To burn the downloaded image you can use Raspberry Pi Imager and you’re off to the races.

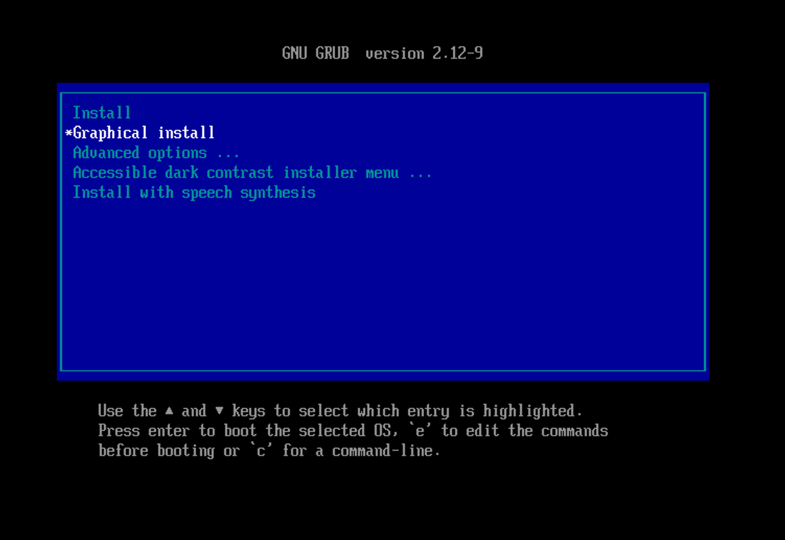
Step 3: Boot into the BIOS and boot up the USB. From there, some installation notes:

  1. Choose Graphical Install, will make the rest of the process more visually pleasing.
Keep it easy – choose Graphical install

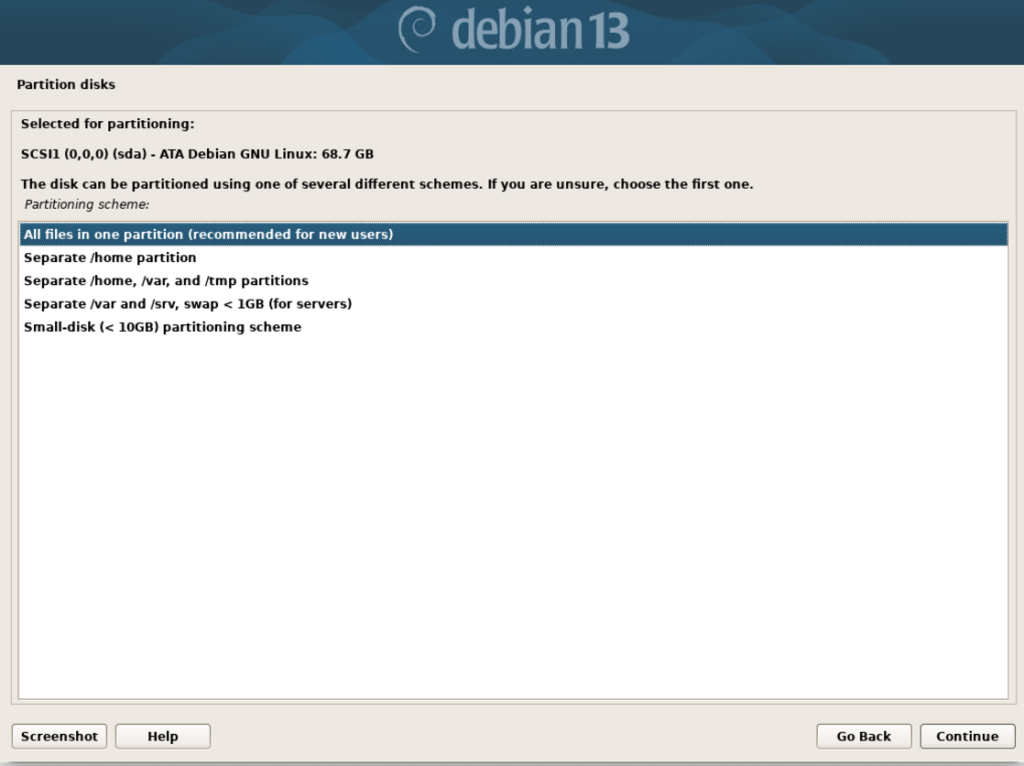
2. When asked about Partition disks (assuming the device data can be erased) choose “Guided – use entire disk and set up encrypted LVM”.

Encryption means no one will be able to access your data without your encryption password – be sure to save/remember it!

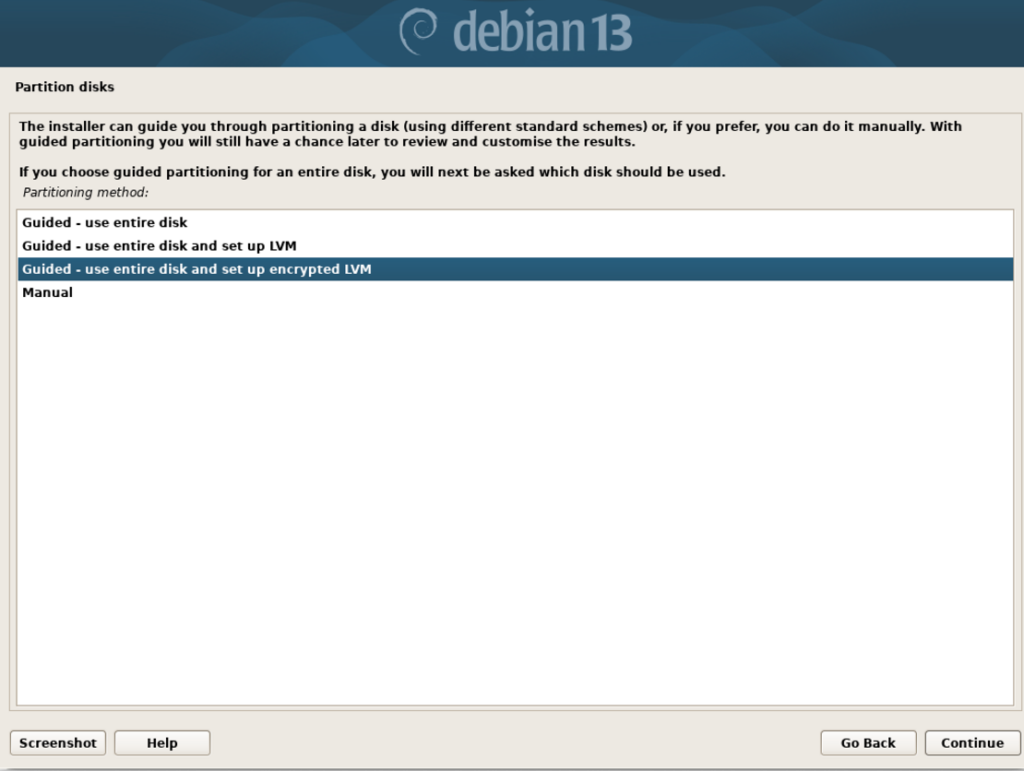
and confirm “All files in one partition (recommended for new users)”. We’re ‘new users’ after all.

Next, lets confirm we want GNOME as our Desktop Environment, your selection should look like the following:

Debian 13 Software Installation Defaults

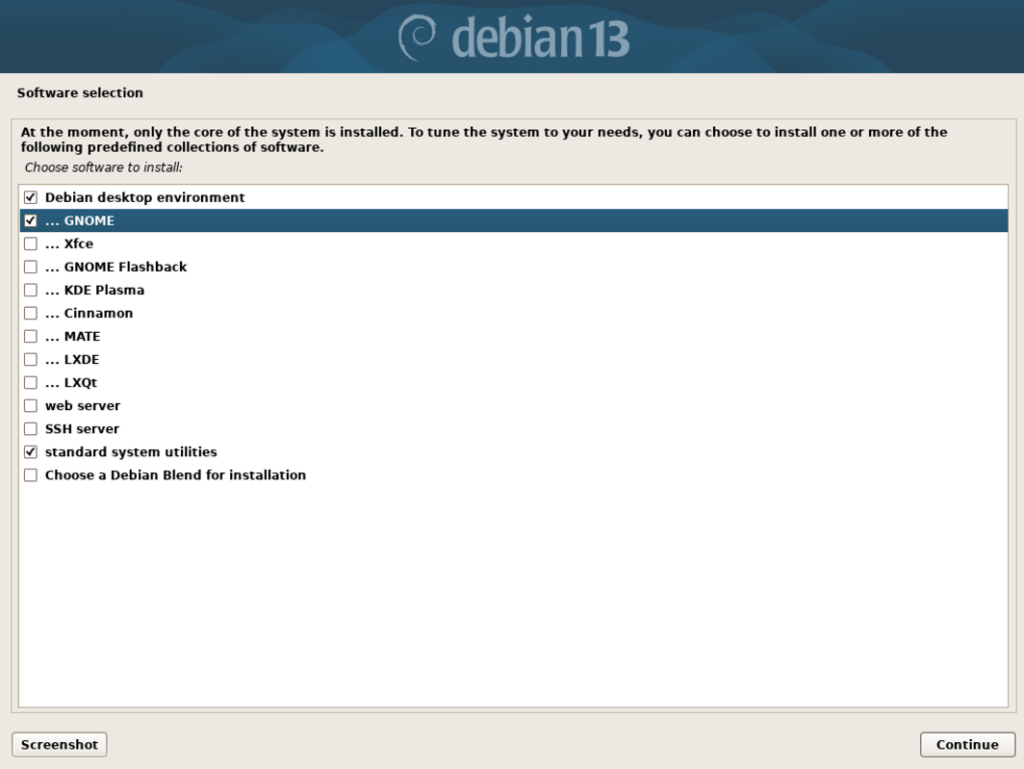
Note: You could choose a non-default environment such as KDE Plasma (Windows inspired) or Xfce (retro) – but that’s beyond the scope of this post.

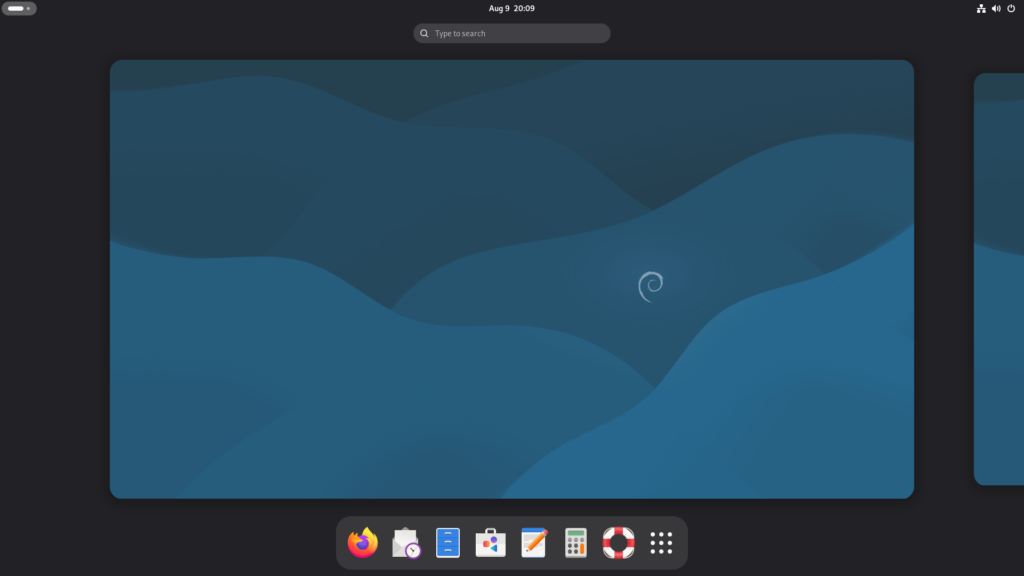
From there you’ll be asked to choose username & password and voila! You’re done with the installation, after a restart you’ll see your new desktop:

Default Debian 13 GNOME desktop

Step 3: Installing Software

You can use the app called “Software” to find and download apps from the Debian repository. Most people will want to also access apps from Flathub, which enables you to have access to many more apps. To do that you should write these 3 lines in your terminal and restart.

  1. sudo apt install flatpak
  2. sudo apt install gnome-software-plugin-flatpak
  3. flatpak remote-add –if-not-exists flathub https://dl.flathub.org/repo/flathub.flatpakrepo

Note: If terminal says you don’t have sudo rights, it means you set a root password during the initial installation. You must grant your username sudo rights. For that, simply type, in order (replace your_username by your actual username), and then restart:

  1. su -
  2. usermod -aG sudo your_username

And that’s pretty much it, you’re good to go! Here are the top downloaded apps, you can search and install them from your Software app. It will keep them updated too!

Did I miss anything? Suggestions? Do not hesitate to reach out.

After 4 years, Starlight has been acquired!

What a journey! After 4 years, Starlight has been acquired!

In 2021, frustrated with the note apps available (Evernote, OneNote, NotePad++…), I started developing Starlight.

The premise was simple: increase productivity by removing note and task management overhead, letting users focus on their actual work while staying on top of the business. The app enabled that by:

     1. Adding structure using smart templates and dynamic formatting

     2. Enabling users to combine notes and inline actions

     3. Consolidating actions across all notes into an easily digestible view

Being brutally honest, I thought it would be much faster to develop than it actually was, my initial assessment was 6 to 12 months. Not quite…

All in all it took me almost two years to develop, double my original estimate.

r/depressedmemes - We do this not because it is easy. but because we thought it would be easy.

There were many contributing factors, but mainly:

  • Although SwiftUI had been around for a while, macOS support was flaky (arguably still is)
  • Smart formatting and in-line actions required significant optimization work to ensure responsiveness in long notes 
  • Integrating in-line actions and task objects in CoreData was a great feature, but very tricky to get right

No regrets though – since its launch in May 2023, Starlight has received 10 major updates and has established a small but mighty loyal user-base. 

So why sell?

Starlight is free to download and use, however keeping it updated requires significant time and effort. As I look forward I’m going to be focusing on smaller hobby projects or revenue-generating apps. 

What will happen to my data?

Your data is yours, no user data is being shared as part of this sale. 

Can I continue to use the app?

Yes! If you have already downloaded Starlight, it will continue to work as normal. 

Can I try Starlight?

Although Starlight is no longer available to download here’s some great alternatives: Obsidian, Agenda or TaskPaper

Will there be more app updates?

Starlight 1.2.2 is the final update.

I have a question!

Do not hesitate to reach out

Thanks to all the users of Starlight, and doubly so to those who shared feedback to make the app better!

All previous posts about Starlight: 

What differentiates good from great Product Managers?

Struggling with a basic macOS SideBar, RowList & DetailView app in SwiftUI

Identifying combinations of dates in text using regex

The Eisenhower Matrix

Counting Core Data entries based on relationship entities

Multiple Word, Random Order Search – CoreData & SwiftUI

Using NSSortDescriptor to sort Dates and nil values

SwiftUI modifier order matters, a lot

Preventing edits in TextFields unless cell is selected

MenuBar Items in SwiftUI

Using NSTextView in SwiftUI

Iterating on MarsManaged Palette & Icon – First Round

Making an editable Label with SwiftUI

Working on all new TO-DO views for MarsManaged

Expanding TO-DO views for MarsManaged

SwiftUI macOS Preference Pane | Preferences

MarsManaged March update, Alpha coming soon?

TextField Recommendations / Autocomplete – SwiftUI macOS and iOS

Badges? Gray Badges? Color Badges!

Creating a macOS “About” screen the SwiftUI way

Adding an overlay when there’s no content to show – SwiftUI Empty States

Schedule & re-Schedule any action with Dynamic Date parsing

Replacing NSTextView text programmatically without affecting its style and format

Bom Dia

MarsManaged July Update: New Palette, Icon, UX Improvements…

SideBar: The Silent Super-Feature

MarsManaged onboarding – Unleashing a new golden age for humanity!

Restoring macOS window after close – SwiftUI WindowsGroup

Easily linking any AppKit or UIKit class with SwiftUI

And just like that, MarsManaged has reached Beta!

Leveraging SF Symbols from code

Starlight has gone gold!

Starlight is alive!!!

Starlight – Soft launch, week 1 update

Starting to code again 🙂 on in app purchases 🙁

Settling down in the Bay & Starlight 1.0.4 is now live!

It’s been a year? What?!

Starlight 1.2.0

Learnings from PowerVoice Product Hunt Launch

PowerVoice ‘try before you buy’ onboarding missed the mark.  

I had aimed to minimize the time between landing on the site and experiencing value by allowing users to immediately upload their own audio files for free. While this approach works well for many apps, it didn’t work for PowerVoice.

Why? Three reasons:

Trust: Users were hesitant to share personal recordings without clearly seeing the value upfront. However, until they uploaded a file they would not see the value, catch 22. 

– Logistics: Most users who wanted to try it did not have a relevant audio file handy. Even if they planned to come back later – the reality is that attention is very limited. If you lose the user before you show them value it’s very hard to get them back. 

Messaging: I tested two approaches, one emphasizing the “what” and one the “why”. In terms of engaging, the “why” version performed better than the “what” one. However, it failed to show or explain features of the product – and given the ‘Trust’ and ‘Logistic’ challenges already mentioned, resulted in low conversion overall. 

Above: left focused on the what, right focused on the why

Thanks to all this feedback, I’ve completely revamped the onboarding — it now starts fully focused on the user and their unique needs. Only after they have engaged, I’ll share how the product can uniquely help them overcome their problems

After completing the pre-flight onboarding, knowing what the app can do for them, users can choose one of three subscription options. All including a 7 day free trial to provide peace of mind.

This experience reinforces the criticality of listening and learning from users, and how that trumps industry conventions. If you’re not familiar with PowerVoice you can learn more about it or try it here, all changes discussed above are live! 

Comments / Feedback? Find me on Mastodon, X, or Bsky

Marc

Apple Music Controller 1.1

There’s been more interest on Apple Music Controller that I was expecting, seems there’s more Apple Music Subscribers than I thought! 

The biggest request by far was adding album art, happy to oblige – enjoy your album art in all their glory

If you own the app it will automatically update, else grab it now!

Comments / Feedback? Find me on Mastodon, X, or Bsky

Marc

PS. Given I’m doing this app for fun I’m considering open sourcing it so others can contribute to it, thoughts?

Improving PowerVoice based on early user feedback

As PowerVoice launch approaches, I’ve been focused on addressing early user-feedback, fixing bugs and polishing the UI. One of the amazing things about developing on the web is how fast you can learn, iterate and deploy – such a joy. Here’s some of the changes done in the last two weeks:

1. Improving landing page to increase conversion

  • Outcome-focused: focusing on great communicators as opposed to product visuals 
  • KISS (keep it simple, stupid):
    • Simplified CTA: Moving away from the abstract “Start The Practice”, instead opting for the very obvious “Upload Recording”
    • Reworded secondary CTA: from ‘Preview Now’ to ‘View Demo’
  • Overall Polish: Minor tweaks in copy, addition of favicon and logo

2. Decreasing time to value for new customers

I’m purposely hiding some of the features with the intent of keeping first interaction with the app very intuitive and fast. 

  • Before: 1.“Start the Practice” -> 2. Choose audience -> 3. Choose goal -> 4. Choose if you want to upload a file or practice live -> Get your report
  • Now: 1.“Upload a Recording” -> Get your report

Once the user sees the value and creates an account, the additional features become available. 

3. Refining report visuals

  • Moved “Highlights” to the left, and “Scores to the right”, following how users use the app
  • Increased standard font size for increased legibility
  • Changed “Poor” label for “Review”
  • Speaker Id’s are now bold, making them easier to spot
  • When in Demo Mode, “Try Now” button appears at the top

4. Made providing feedback even easier

At the end of the day the best way to improve the product is based on user feedback. It’s now easier than ever. 

5. Many other bug fixes, tweaks and LLM improvements – some highlights:

  • Attempting to sign in, while having an active session, will take user to their dashboard
  • Improved error handling and notifications
  • PowerVoice is now a harder grader
  • Favicon now properly displays in all browsers 

I’m looking forward to launching, likely end of the month. If you’re not familiar with PowerVoice you can learn more about it or try it here

Comments / Feedback? Find me on Mastodon, X, or Bsky

Marc

Create Stations & Favorite Songs from the Menu Bar with Apple Music Controller

It’s time! After polishing rough edges and adding the ability to auto-update, Apple Music Controller is available for download for free. 

Apple Music Controller is a lightweight & distraction-free way to interact with Apple Music from the Menu Bar.

Features:

Lightning-Fast Controls

  • Create stations instantly from the menu bar
  • Add songs to your favorites with one click
  • Control playback without leaving your current app

🎯 Zero-Distraction Design

  • Minimal menu bar presence
  • Lightweight and resource-efficient
  • Native macOS look and feel

❤️ Why You’ll Love it

  • Stay in your workflow
  • Discover new music effortlessly
  • Save precious clicks and time

You can download it here.

Or know more about the story behind it here

Comments / Feedback? Find me on Mastodon, X, or Bsky

Marc

Apple Music Controller – Create Stations & Favorite Songs from the Menu Bar

It’s hard for me to even imagine coding without music.

In fact, for years I had my carefully curated iTunes library with a playlist for every occasion.  Yep, back when music was bought as CDs and ripped. 

JWulen on X: "@elcanalrandom https://t.co/GsUyPRGEe9" / X

I still have my library, of course,  but I’ve been using Apple Music as my daily driver for years now. I love how easy it is to discover new music, mostly by using “Favorite” and “Create Station” when I find songs I like.

Here’s the thing though… It’s slightly distracting & unnecessarily complicated to do (i.e. go to the dock, open Apple Music, right click on the three small dots, and then create the station).

And I know it looks nitpicky, but when you’re in the middle of solving a complex coding problem, the last thing you want is to context switch. As illustrated by Jason Heeris:

r/ProgrammerHumor - Why developers hate being interrupted.

So how do I fix it? Well, for the longest time I would just ‘deal with it’ – but this past weekend, after having worked on PowerVoice for a while, I wanted to tackle a fun little project. And, a couple hours later, a lightweight & distraction-free way to interact with Apple Music was born. 

It’s been so much fun to build. I improvised a quick icon and named it with the groundbreaking ‘Apple Music Controller’ name.

Once tested enough, it’ll be available as a free download – stay tuned. (Update 2/21 -> Grab it now)

And if you’re an Apple Music subscriber and would like an early copy, hit me up

Comments / Feedback? Find me on Mastodon, X, or Bsky

Marc

Level Up Your Speaking Skills When No One’s Watching – PowerVoice™

I’ve always been fascinated by great communicators: Steve Jobs, Barack Obama, Winston Churchill… Great leaders tend to be masters at it – instilling a sense of purpose, distilling complex topics into simple terms, rallying individuals to achieve the impossible. And, although some individuals have innate traits, the reality is that great communicators aren’t born; they’re made. 

Churchill (pictured above) trained in oratory from a very early age. Jobs meticulously refined his pitches for maximum impact, and Obama invested countless hours in practice, preparing extensively for every major speech.

If everyone can become a great communicator though, why are there so few? 

  • Once you graduate – unless you’re lucky (or wealthy) enough to have a coach – it’s no one’s job to continue to push you to become a better communicator. You could try to improve for yourself, but are you focusing on the right things? We don’t know what we don’t know after all.

  • Asking coworkers to provide candid feedback is even harder. Most will shy away from providing it. From their perspective, they have nothing to win and much to lose, what if you don’t take the feedback well?

  • Unlike in school, there’s no ‘safe playground’ to practice, to try new things and make mistakes (note: if you have a toastmasters nearby, it’s a good idea to join – even though quality varies widely from club to club).

If you’ve struggled with this you’re not alone. So… what to do?

What if you could work with a personal coach from the convenience of your home? A coach that’s always available to practice, eager to listen to your recordings, and always there to provide actionable feedback – all for a subscription price everyone can afford. 

That’s exactly what PowerVoice™ aims to be.

Great communicators have always had the upper hand. Now, with the advent of GenAI and the masses increasingly turning to LLMs for their writing, those who excel at public speaking and verbal communication will have an even greater advantage in standing out. That’s why I built PowerVoice to be your personal communication coach, available whenever you need it.

1. How does PowerVoice work?

Start by picking your audience and goal, then either start practicing or upload a recording – that’s it! 

Once your audio is analyzed by PowerVoice, you’ll see your results – including an overall assessment and score, as well as line-by-line actionable feedback. You can easily focus on the areas that need attention by clicking on “Fair” or “Poor”.

Once done, you can go to your Dashboard where you’ll find all your previous sessions and scores – so you can see how fast you’re progressing. It’s also from where you’ll start new live coaching sessions or upload recordings. 

2. What if my audio contains more than one speaker?

PowerVoice automatically detects it and creates separate tracks for each, allowing you to easily select who you are.

3. How much does it cost?

While in Alpha, PowerVoice is free to use – please send me feedback on what you like, what you don’t and what could be made better. You can use the feedback button or email me directly at feedback@powervoice.app

Once it’s released, it will have options to subscribe either monthly or yearly (at a substantially lower price). 

4. Why doesn’t it do X?

I may not have thought about it, do let me know your ideas at feedback@powervoice.app

In an AI World, great speakers stand out. Ready to transform your communication skills?

  • Get unlimited coaching sessions during the alpha period
  • Shape the future of PowerVoice with your feedback 
  • Get early access to latest features 

Marc

P.S. Curious about the development journey? Follow me on Mastodon, X, or Bsky

Running models locally with ML Studio

If you’re looking for an easy way to download and run models locally on your Mac, check out ML Studio. It’s great for testing the latest models and experimenting with different quantization versions.

I used to use terminal directly, but ML Studio makes it much nicer for everyday use. If ML Studio is not your cup of tea, another option is combining Ollama with Open Web.

For complex tasks, Claude or OpenAI are still king, but more and more I find I can use local models that perform just as well for many tasks. The one I’m currently using is Phi 4 (lmstudio-community/phi-4-GGUF), not only it gives great answers, but it runs beautifully on my M1 Max. 

Marc